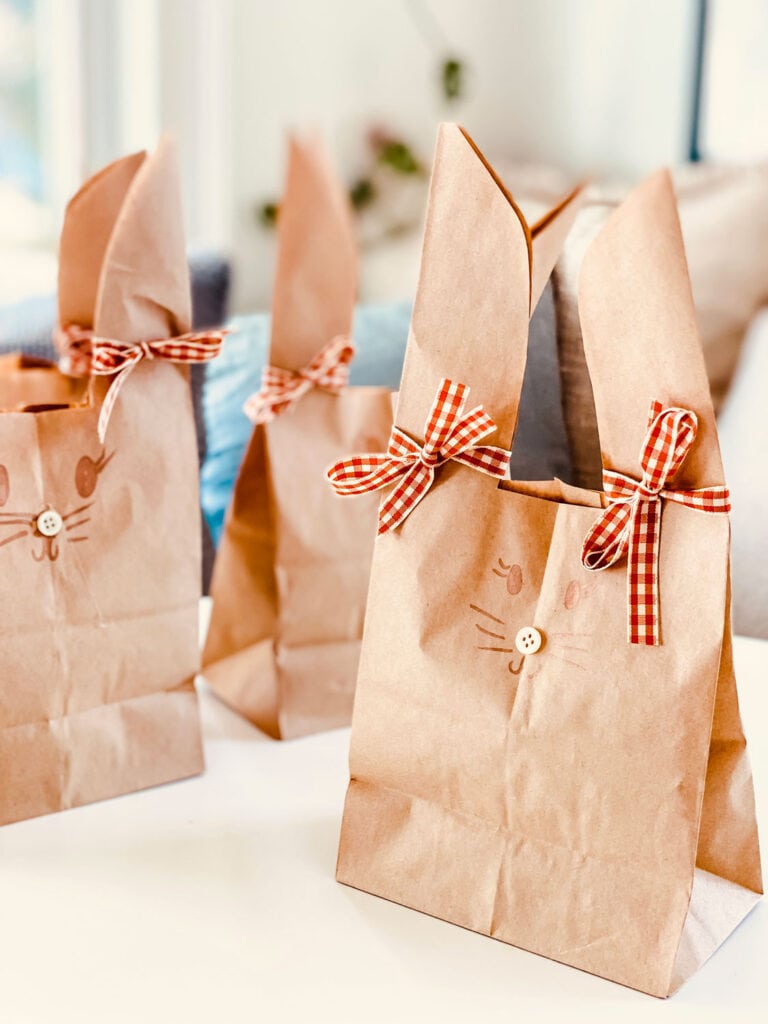
Looking for a creative alternative to traditional Easter baskets or a charming addition to your table? Dive into the world of DIY with our easy tutorial for making adorable paper bag Easter bunnies. These sweet creations not only add a touch of whimsy to your festivities, but also serve as wonderful containers to hold Easter treats and treats. Plus, with just a few simple supplies, you can jump into this fun project with ease, making it suitable for toddlers and kids of all ages.
What you’ll need to make a DIY Easter Bunny paper bag:
- Brown or white paper bag (lunch bags work perfectly)
- Ribbon or string for decoration
- A marker (such as a Sharpie)
- Shredded paper or grass to fill the Easter basket
- Optional: Buttons, cotton balls or pom poms for the nose
- Scissors
- Glue (or hot glue) if you opt for buttons or pom pom noses

Source: https://mostlovelythings.com/https-mostlovelythings-com-paper-bag-bunny/
Creation steps:

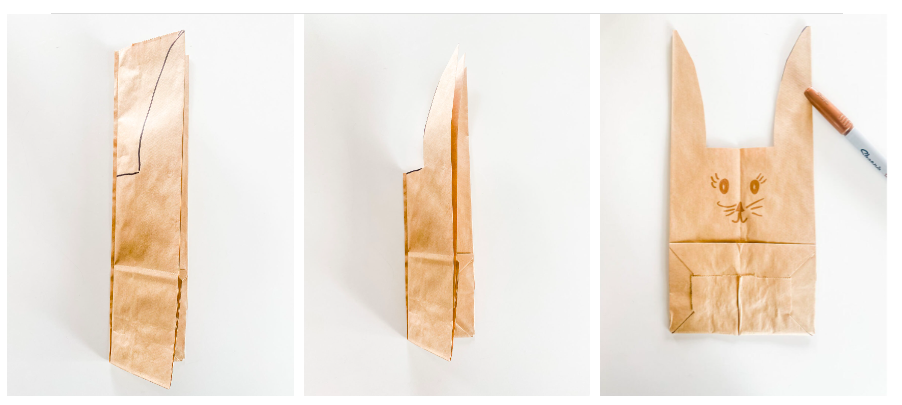
- Start by folding the paper bag lengthwise, making sure the lid is tucked in.
- With the folded sides of the bag on the left side, draw a straight line about 4 inches from the top, extending it about 1 inch in length. Then, from that point, draw a line up to the top of the bag on the right.
- Carefully cut along the lines and open the bag to reveal the bunny ears.
- Using your marker, draw a cute face just above the bottom flap of the bag.
- If desired, attach a button, cotton wool, or pom-pom as the bunny’s nose with glue.
- Fill the bag with scraps of paper or Easter grass to provide a cozy nest for your treats.
- Add selected Easter treats to the bag.
- Finally, tie the bunny ears with small pieces of ribbon or twine to complete the look.
With these simple steps, you’ll have a charming collection of paper bag Easter bunnies ready to delight young and old alike. Be creative and enjoy the joyful spirit of Easter with this fun and simple craft project!